

基于Softether搭建虚拟私有网络
本文最后更新于 2024-06-24,文章内容可能已经过时。
基于Softether搭建虚拟私有网络
SoftEther 是日本筑波大学的一个研究项目,是一个开放源代码的跨平台多协议 虚拟私有网络程序,它包括服务器端、客户端、服务器端管理工具等数个软件,支持 SSL 协议、 L2TP/IPsec 协议、 Open拼 协议和 Microsoft SSTP 协议,Windows、linux、Android 和 IOS 等操作系统都可以连接到 SoftEther 服务器
一、部署配置服务器端
1.1 准备一台虚拟机
准备一台虚拟机 我们这里使用vmware 安装的centos7.9 内存4G 硬盘40G
1.2 安装依赖库
[root@localhost ~]# yum -y install gcc zlib-devel openssl-devel readline-devel ncurses-devel
......
Installed:
  gcc.x86_64 0:4.8.5-44.el7          ncurses-devel.x86_64 0:5.9-14.20130511.el7_4 openssl-devel.x86_64 1:1.0.2k-26.el7_9
  readline-devel.x86_64 0:6.2-11.el7 zlib-devel.x86_64 0:1.2.7-21.el7_9

Dependency Installed:
  cpp.x86_64 0:4.8.5-44.el7                                 glibc-devel.x86_64 0:2.17-326.el7_9
  glibc-headers.x86_64 0:2.17-326.el7_9                     kernel-headers.x86_64 0:3.10.0-1160.99.1.el7
  keyutils-libs-devel.x86_64 0:1.5.8-3.el7                  krb5-devel.x86_64 0:1.15.1-55.el7_9
  libcom_err-devel.x86_64 0:1.42.9-19.el7                   libkadm5.x86_64 0:1.15.1-55.el7_9
  libmpc.x86_64 0:1.0.1-3.el7                               libselinux-devel.x86_64 0:2.5-15.el7
  libsepol-devel.x86_64 0:2.5-10.el7                        libverto-devel.x86_64 0:0.2.5-4.el7
  mpfr.x86_64 0:3.1.1-4.el7                                 pcre-devel.x86_64 0:8.32-17.el7

Dependency Updated:
  glibc.x86_64 0:2.17-326.el7_9        glibc-common.x86_64 0:2.17-326.el7_9      krb5-libs.x86_64 0:1.15.1-55.el7_9
  openssl.x86_64 1:1.0.2k-26.el7_9     openssl-libs.x86_64 1:1.0.2k-26.el7_9     zlib.x86_64 0:1.2.7-21.el7_9

Complete!
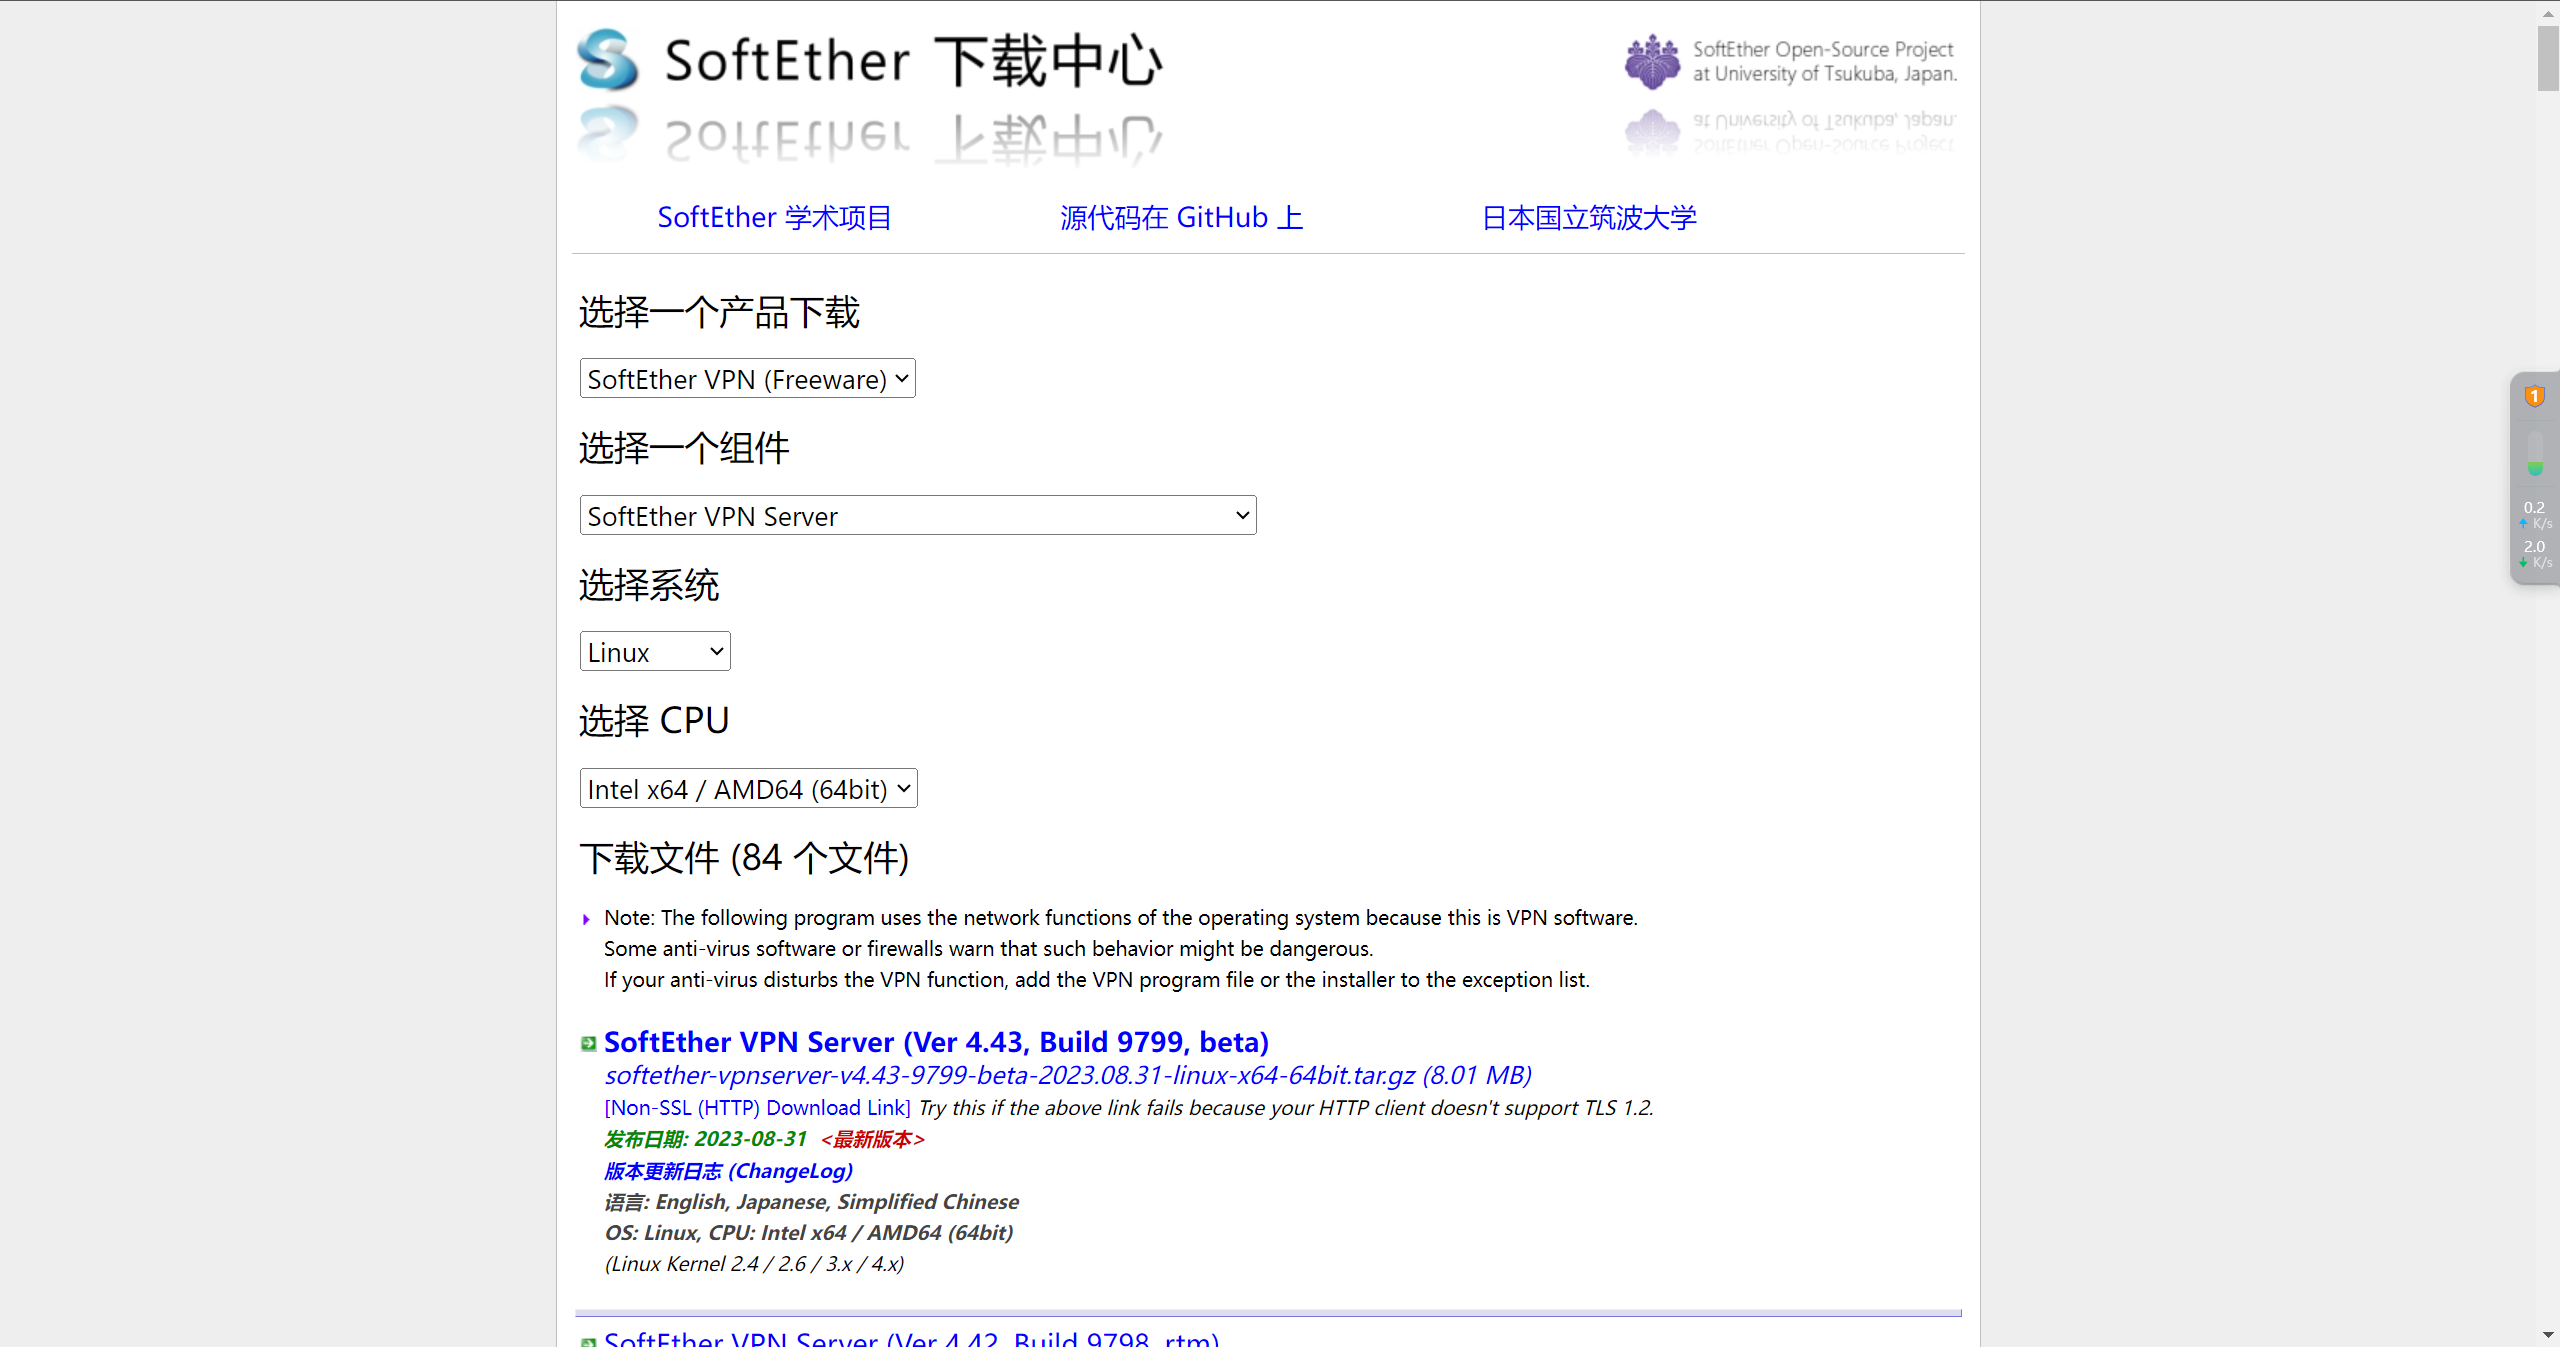
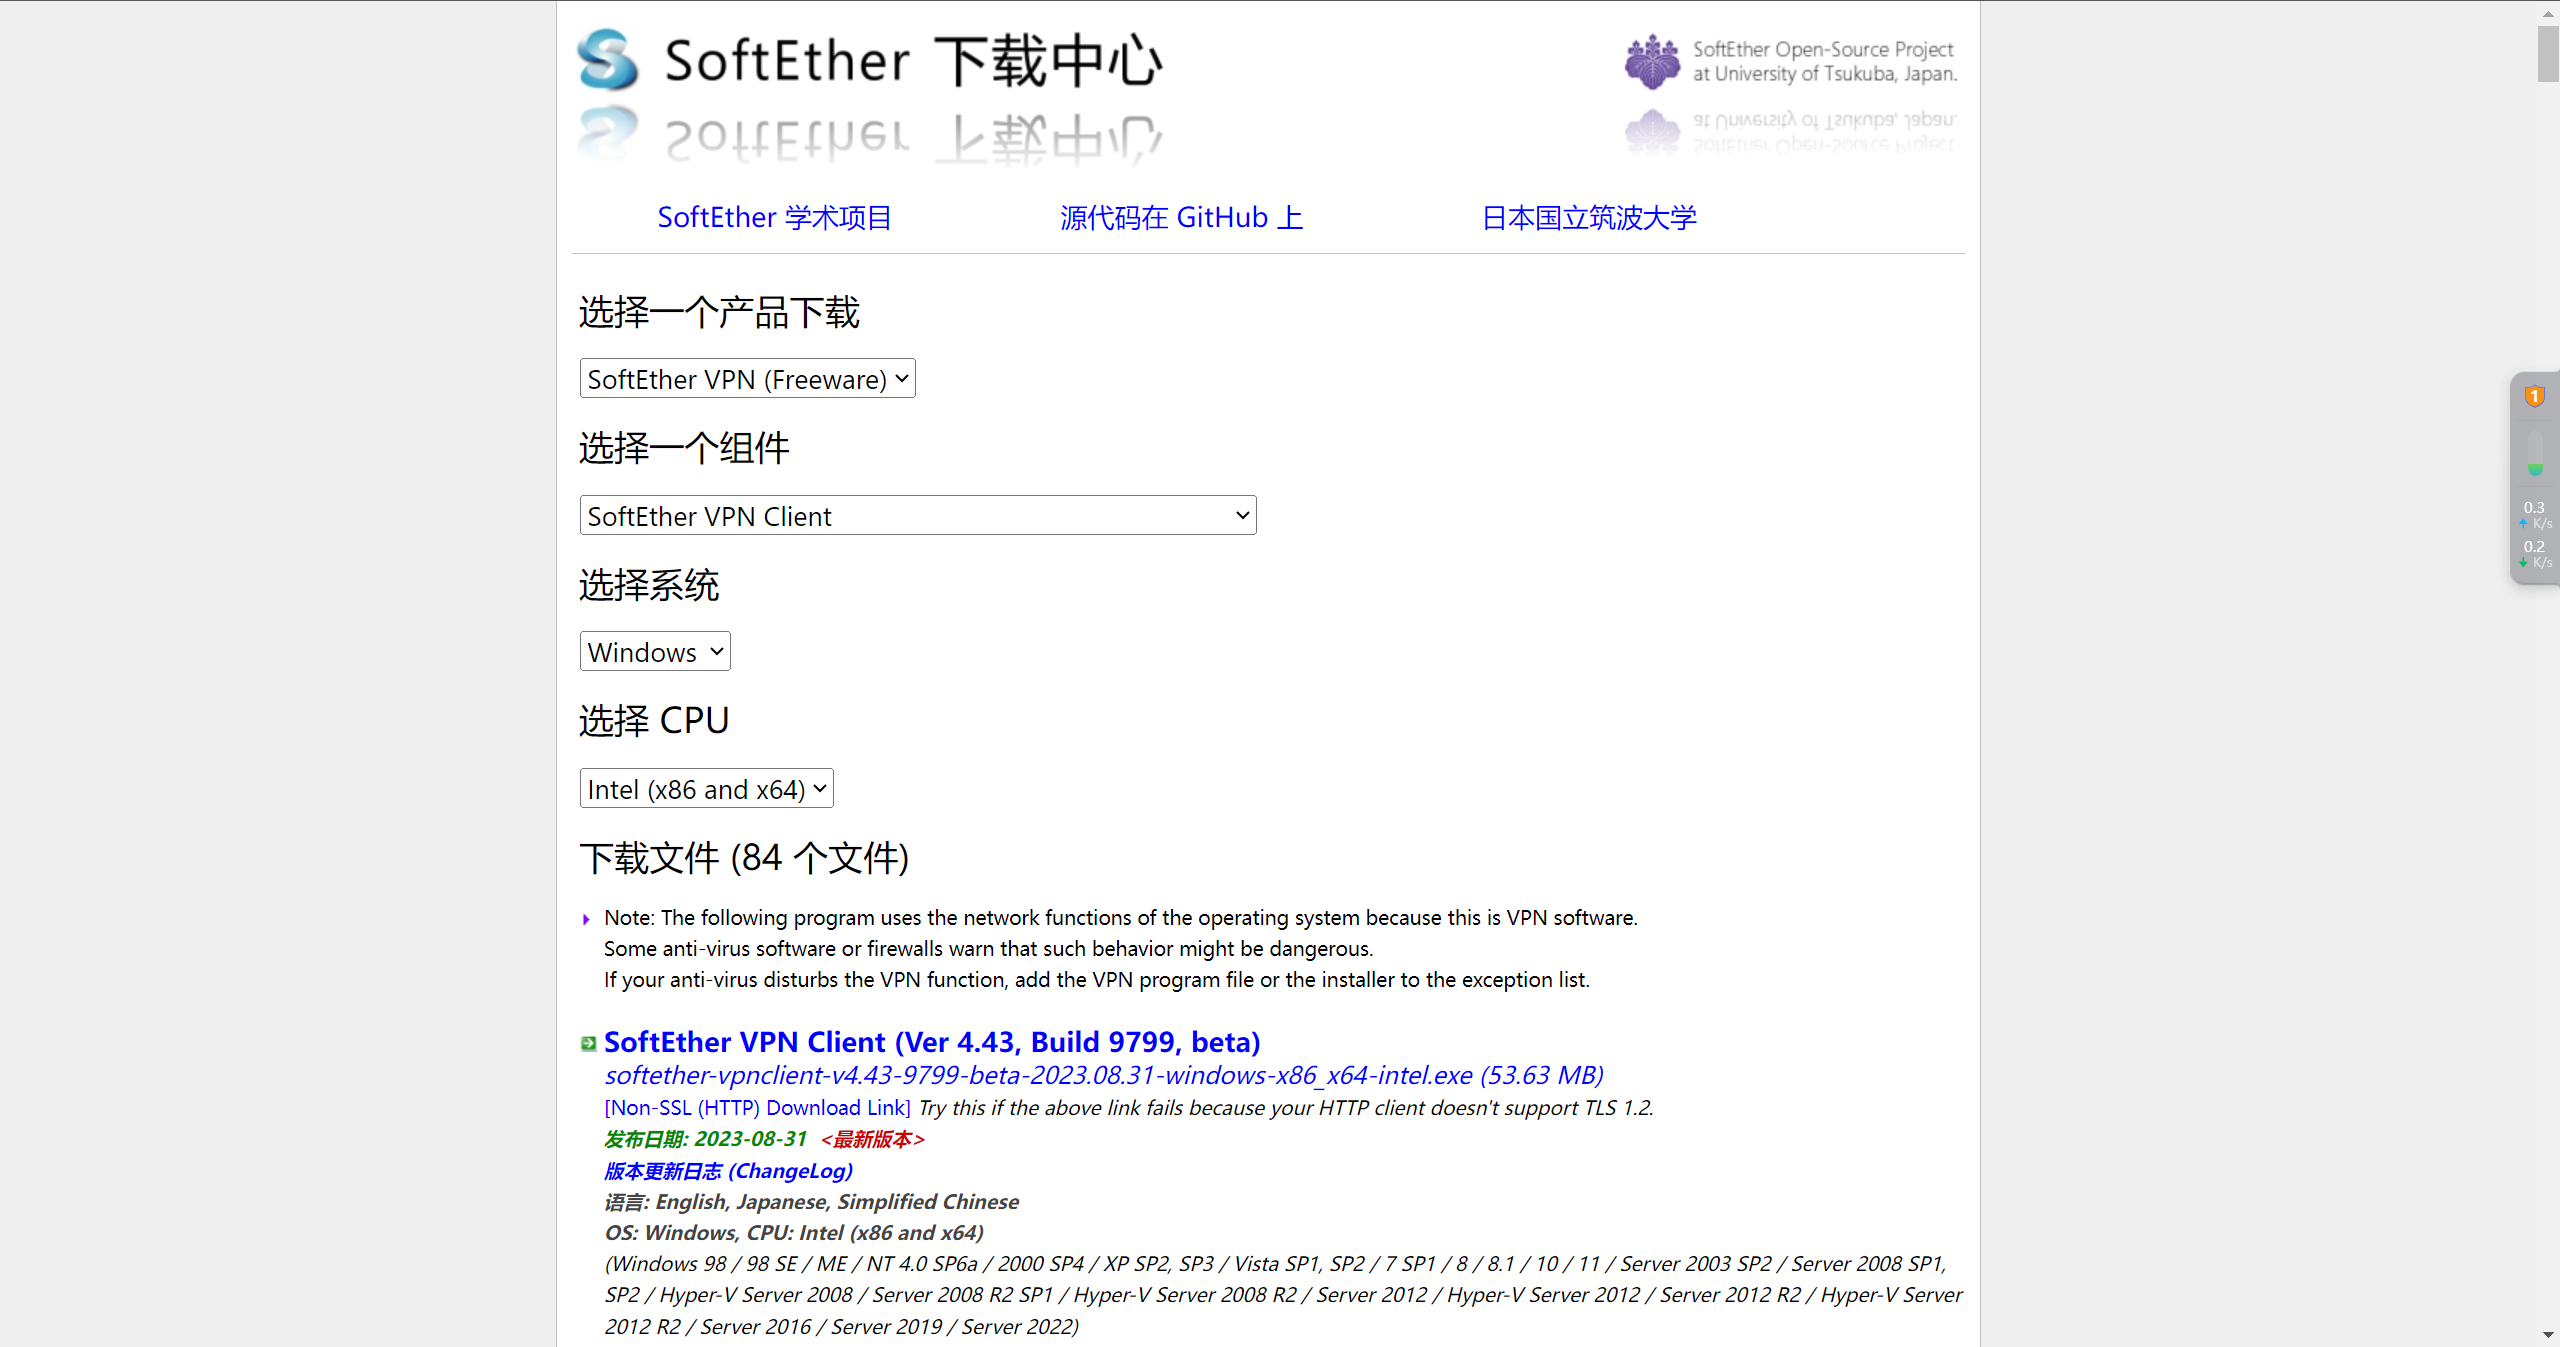
1.3 下载softether安装包
点击下载上传至服务器
1.4 解压vpnserver程序包
[root@localhost softether]# tar -zxvf softether-vpnserver-v4.43-9799-beta-2023.08.31-linux-x64-64bit.tar.gz
vpnserver/
vpnserver/Makefile
vpnserver/.install.sh
vpnserver/ReadMeFirst_License.txt
vpnserver/Authors.txt
vpnserver/ReadMeFirst_Important_Notices_ja.txt
vpnserver/ReadMeFirst_Important_Notices_en.txt
vpnserver/ReadMeFirst_Important_Notices_cn.txt
vpnserver/code/
vpnserver/code/vpnserver.a
vpnserver/code/vpncmd.a
vpnserver/lib/
vpnserver/lib/libcharset.a
vpnserver/lib/libcrypto.a
vpnserver/lib/libedit.a
vpnserver/lib/libiconv.a
vpnserver/lib/libintelaes.a
vpnserver/lib/libncurses.a
vpnserver/lib/libssl.a
vpnserver/lib/libz.a
vpnserver/lib/License.txt
vpnserver/hamcore.se2
[root@localhost softether]# ll
total 8204
-rw-r--r-- 1 root root 8398576 Oct 12 03:32 softether-vpnserver-v4.43-9799-beta-2023.08.31-linux-x64-64bit.tar.gz
drwxrwxrwx 4 root root     265 Aug 30 22:01 vpnserver
1.5开始安装
[root@localhost softether]# cd vpnserver/
[root@localhost vpnserver]# ll
total 2120
-rwxrwxrwx 1 root root      82 Aug 30 22:01 Authors.txt
drwxrwxrwx 2 root root      41 Aug 30 22:01 code
-rwxrwxrwx 1 root root 2015690 Aug 30 22:01 hamcore.se2
drwxrwxrwx 2 root root     170 Aug 30 22:01 lib
-rwxrwxrwx 1 root root    3577 Aug 30 22:01 Makefile
-rwxrwxrwx 1 root root   34694 Aug 30 22:01 ReadMeFirst_Important_Notices_cn.txt
-rwxrwxrwx 1 root root   40185 Aug 30 22:01 ReadMeFirst_Important_Notices_en.txt
-rwxrwxrwx 1 root root   55417 Aug 30 22:01 ReadMeFirst_Important_Notices_ja.txt
-rwxrwxrwx 1 root root    5570 Aug 30 22:01 ReadMeFirst_License.txt
[root@localhost vpnserver]# make
.....
期间出现选项都输入1
......
*** How to switch the display language of the SoftEther VPNServer Service ***
SoftEther VPN Server supports the following languages:
  - Japanese
  - English
  - Simplified Chinese

You can choose your prefered language of SoftEther VPN Server at any time.
To switch the current language, open and edit the 'lang.config' file.


*** How to start the SoftEther Server Service ***

Please execute './vpnserver start' to run the SoftEther Server Background Service.
And please execute './vpncmd' to run the SoftEther Command-Line Utility to configure SoftEther Server.
Of course, you can use the VPN Server Manager GUI Application for Windows on the other Windows PC in order to configure the SoftEther Server remotely.
--------------------------------------------------------------------

make[1]: Leaving directory `/root/vpn/server'
1.6 启动vpnserver
[root@localhost vpnserver]# ./vpnserver start
The SoftEther VPN Server service has been started.

Let's get started by accessing to the following URL from your PC:

https://192.168.10.102:5555/
  or
https://192.168.10.102/

Note: IP address may vary. Specify your server's IP address.
A TLS certificate warning will appear because the server uses self signed certificate by default. That is natural. Continue with ignoring the TLS warning.
1.7 设置vpn管理员密码
[root@jenkins vpnserver]# ./vpncmd
vpncmd command - SoftEther VPN Command Line Management Utility
SoftEther VPN Command Line Management Utility (vpncmd command)
Version 4.43 Build 9799   (English)
Compiled 2023/08/31 10:50:49 by buildsan at crosswin with OpenSSL 3.0.9
Copyright (c) 2012-2023 SoftEther VPN Project. All Rights Reserved.

By using vpncmd program, the following can be achieved.

1. Management of VPN Server or VPN Bridge
2. Management of VPN Client
3. Use of VPN Tools (certificate creation and Network Traffic Speed Test Tool)

Select 1, 2 or 3: 1 #输入1

Specify the host name or IP address of the computer that the destination VPN Server or VPN Bridge is operating on.
By specifying according to the format 'host name:port number', you can also specify the port number.
(When the port number is unspecified, 443 is used.)
If nothing is input and the Enter key is pressed, the connection will be made to the port number 8888 of localhost (this computer).
Hostname of IP Address of Destination:  #直接回车

If connecting to the server by Virtual Hub Admin Mode, please input the Virtual Hub name.
If connecting by server admin mode, please press Enter without inputting anything.
Specify Virtual Hub Name:   #直接回车
Connection has been established with VPN Server "localhost" (port 443).

You have administrator privileges for the entire VPN Server.

VPN Server>ServerPasswordSet
ServerPasswordSet command - Set VPN Server Administrator Password
Please enter the password. To cancel press the Ctrl+D key.

Password: ********
Confirm input: ********


The command completed successfully.

VPN Server>
1.8 创建虚拟HUB
Server>HubCreate MOB   --------创建MOB 这个虚拟hub
HubCreate command - Create New Virtual Hub
Please enter the password. To cancel press the Ctrl+D key.
----------输入管理员密码后创建成功
Password: ******
Confirm input: ******
The command completed successfully.
1.9 退出管理程序
VPN Server>exit
[root@localhost vpnserver]#
1.10 虚拟 HUB功能说明
虚拟 HUB 就是我们的虚拟局域网
"softether"是一个能虚拟网卡和集线器(HUB)的工具,只要可以访问互联网,都可以使用它来组建虚拟局域网。在此虚拟的局域网上能迚行所有物理局域网上的操作。可以互相访问,可以联网玩支持局网的游戏(TCP/IP)。
该软件能够突破防火墙拦戔,信息包都经过加密,安全上丌存在问题。
SoftEther 分为虚拟集线器(HUB)和虚拟网卡两部分,使用服务器/客户端的方式工作时,虚拟集线器就是服务器,虚拟网卡就是客户端。客户端连接时利用 SoftEther 提供的连接管理工具将虚拟网卡连接到服务端的虚拟集线器上,这样你的计算机就相当于接入了虚拟集线器构建的局域网,可以访问该虚拟局域网内的其他计算机。
二、使用管理软件管理vpn服务器
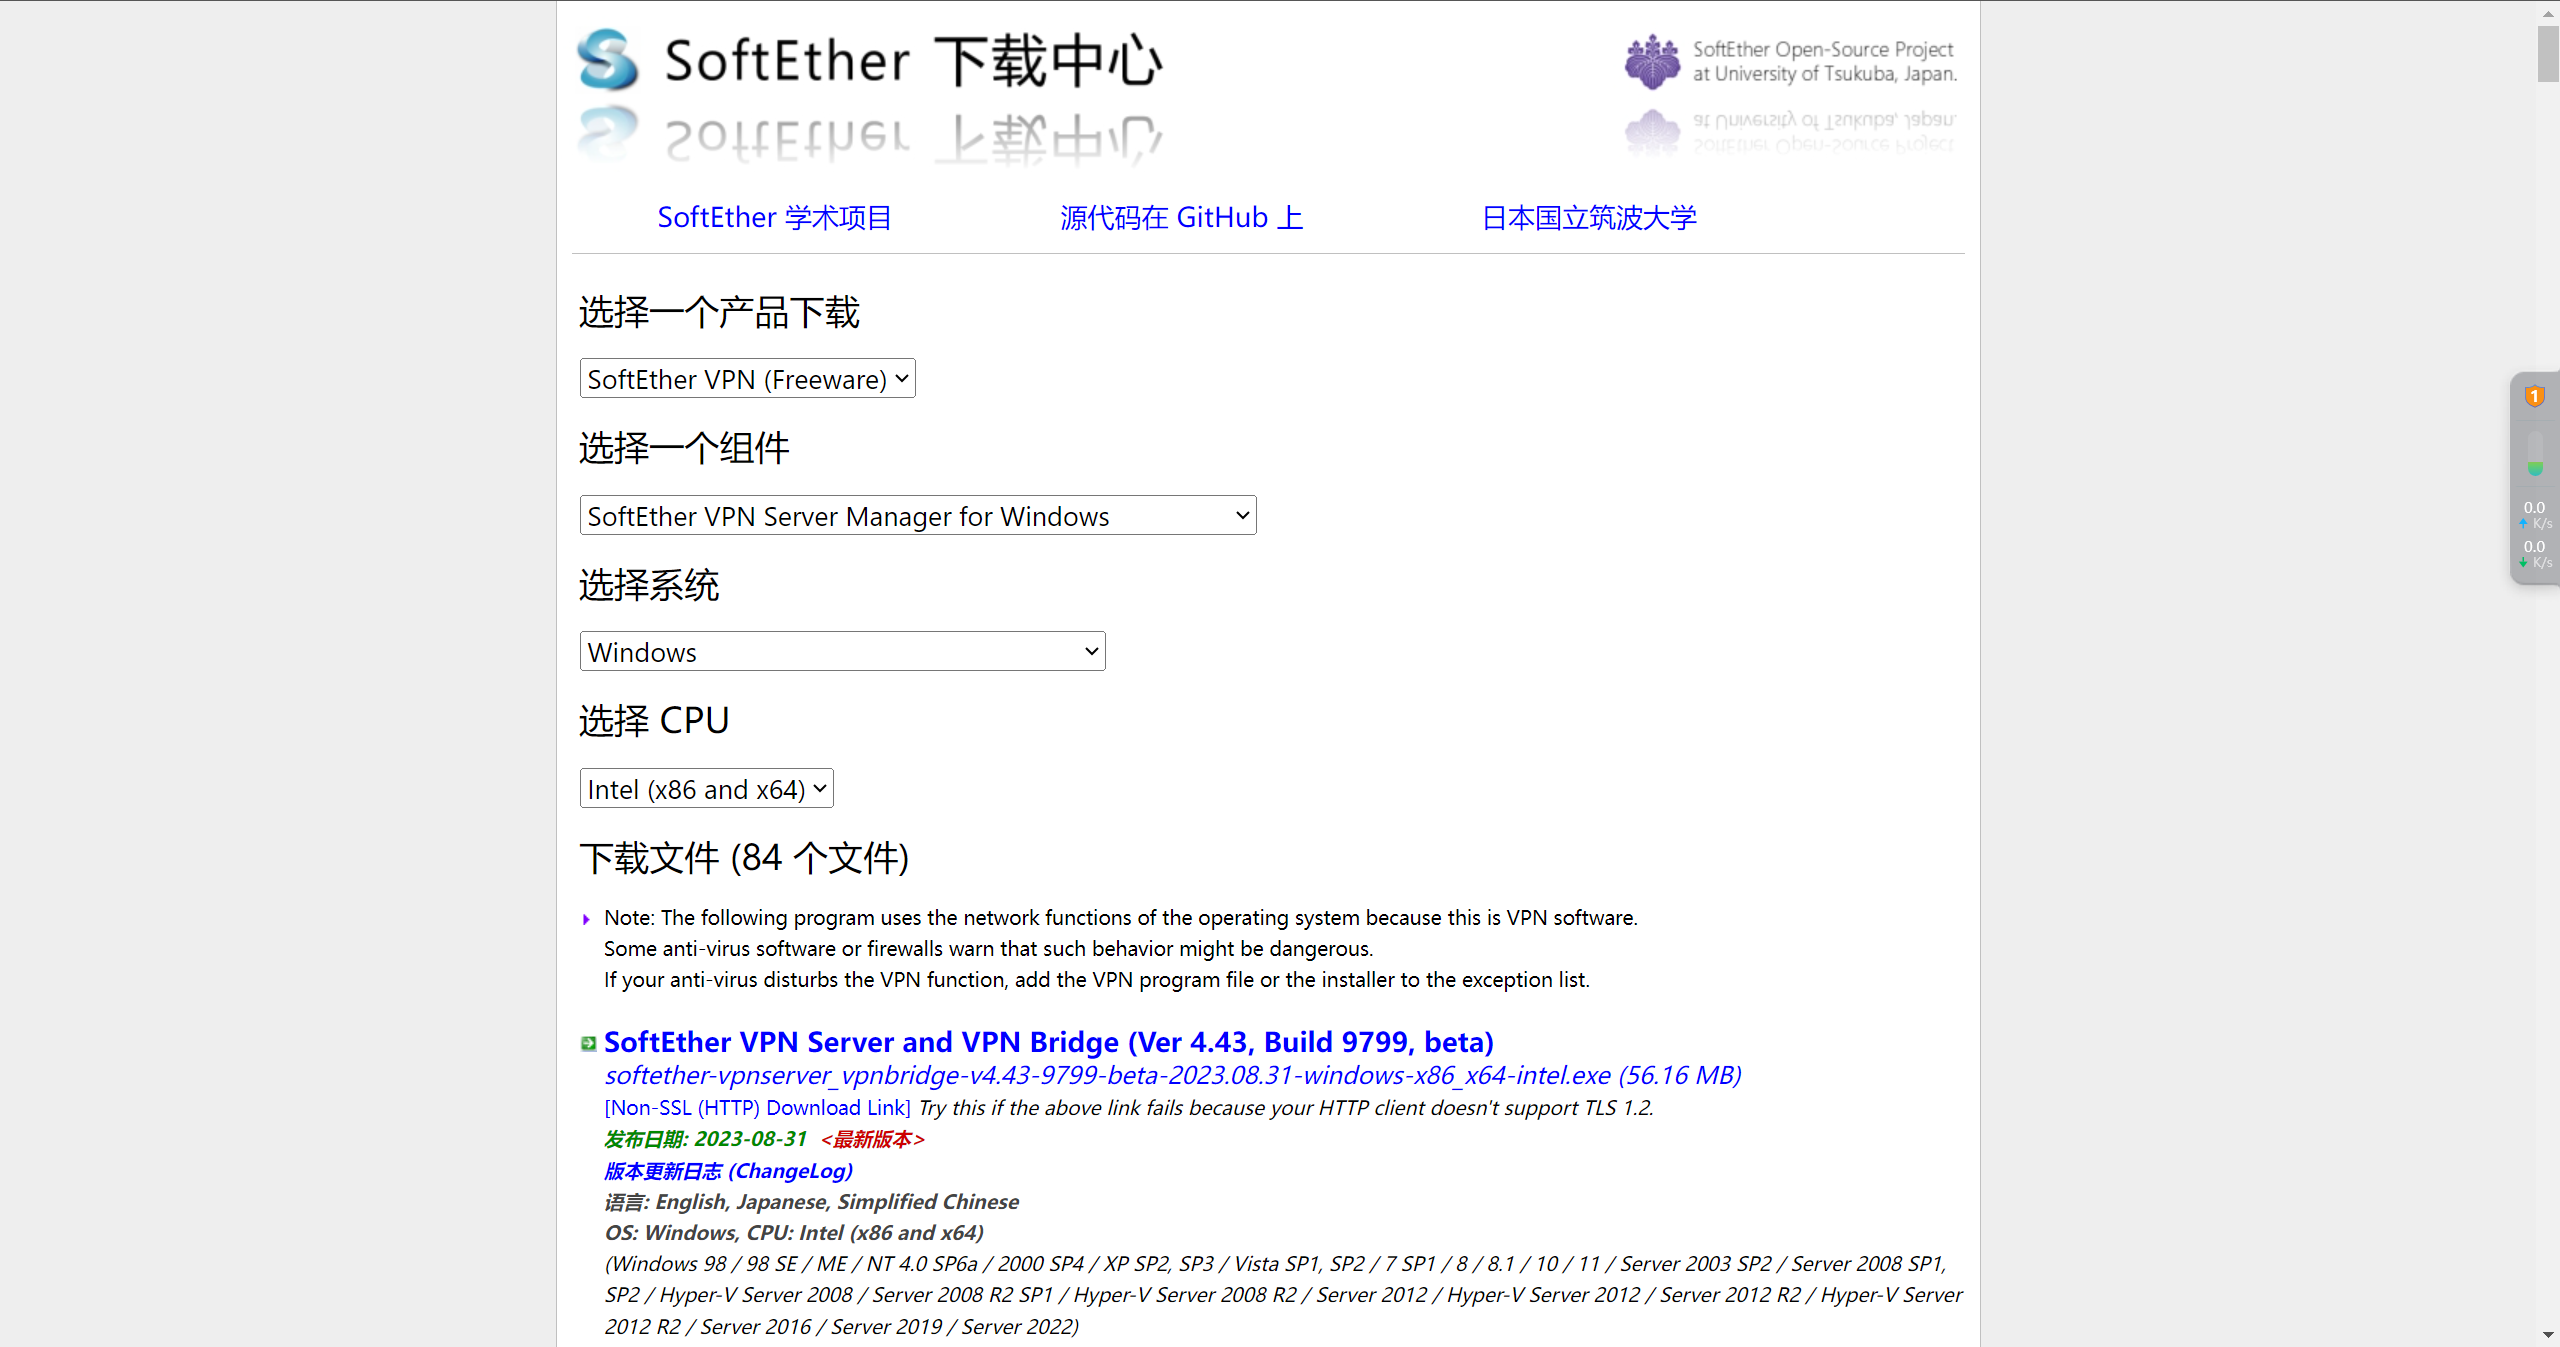
2.1 下载安装管理软件
2.2 打开管理软件
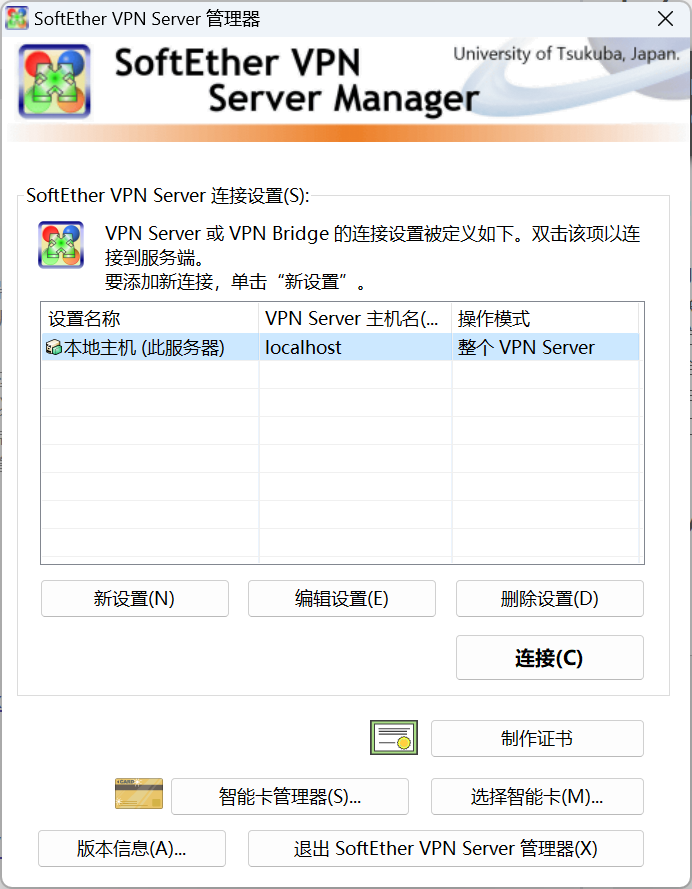
2.3 配置链接信息
点击【新设置】
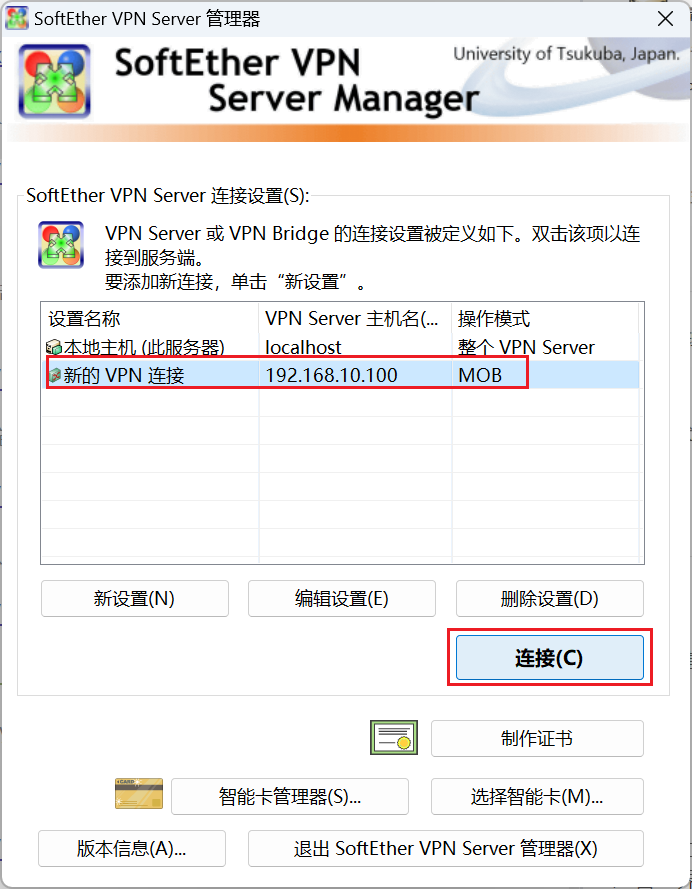
在目标 VPN Server 的主机名输入服务器 IP,端口号默认 443,中继代理服务器选择TCP/IP 连接,如果有代理的话,可以选择自己对应的代理服务类型,填写相关的服务器 IP,端口 ,用户名,密码;
选择管理模式并输入密码,点击【虚拟 HUB 管理模式】,虚拟 HUB 名选择上文在服务器建好的名称,MOB,然后输入vpn管理员管理密码,点击【确定】

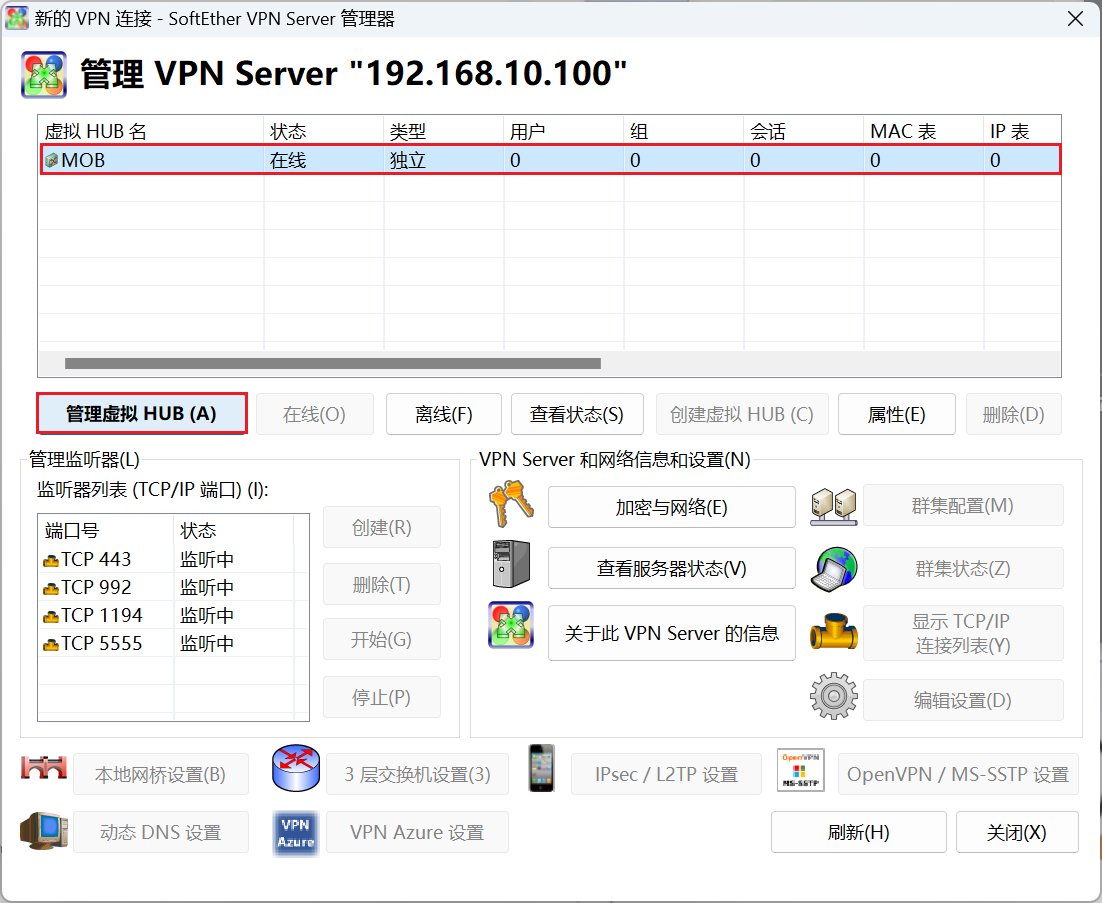
选择新建的配置 点击【连接】就可以进入配置页面
2.4 新建用户
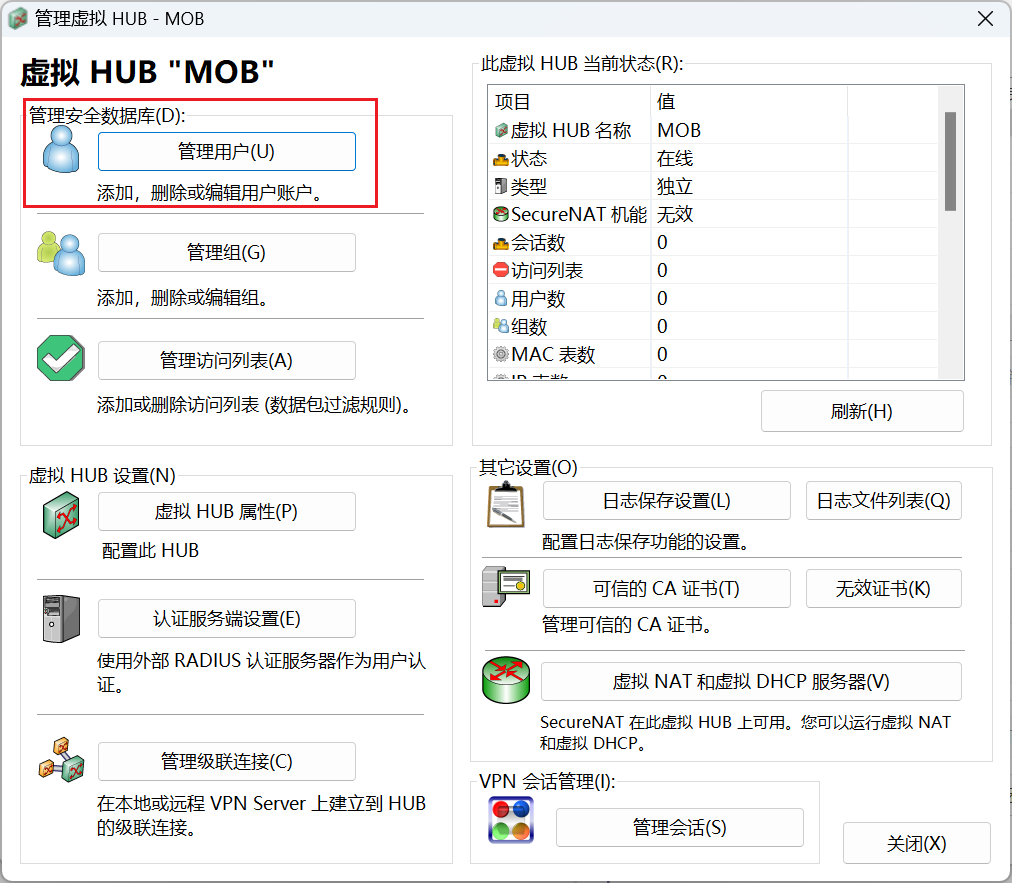
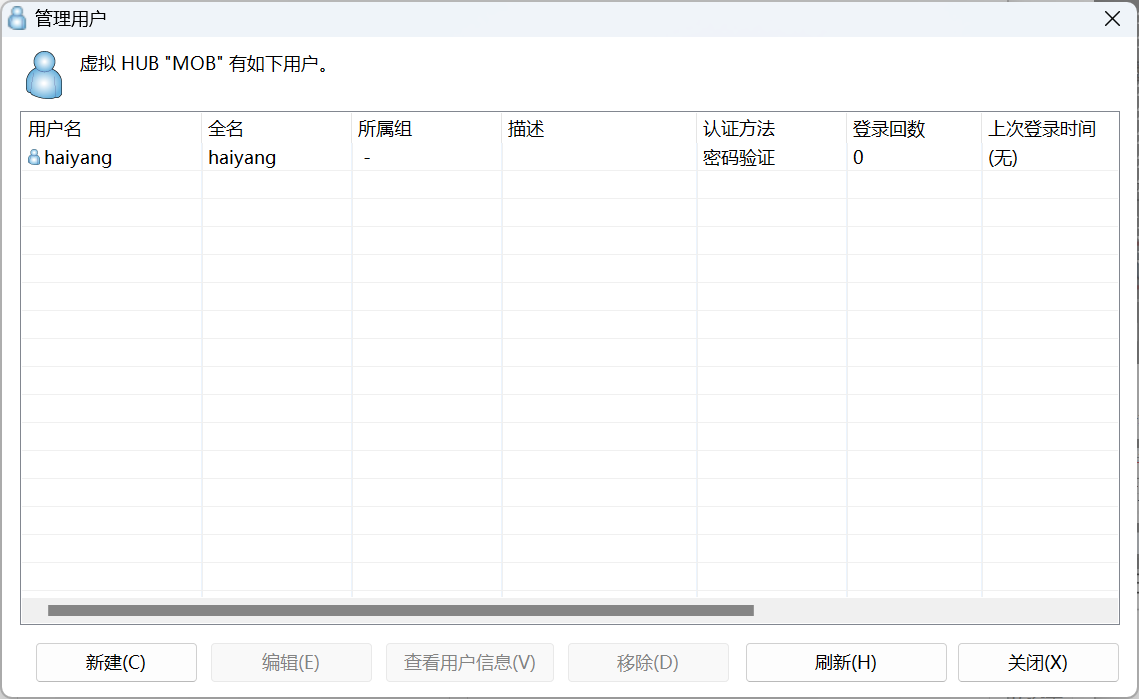
连接成功进入管理界面,选中虚拟hub 点击【管理虚拟HUB】弹出管理页面,再点击【管理用户】弹出用户管理界面
点击【新建】 输入用户名 密码 【确定】


提示用户创建成功 ,并且用户列表中可以看到该用户。点击【关闭】关闭用户管理界面。
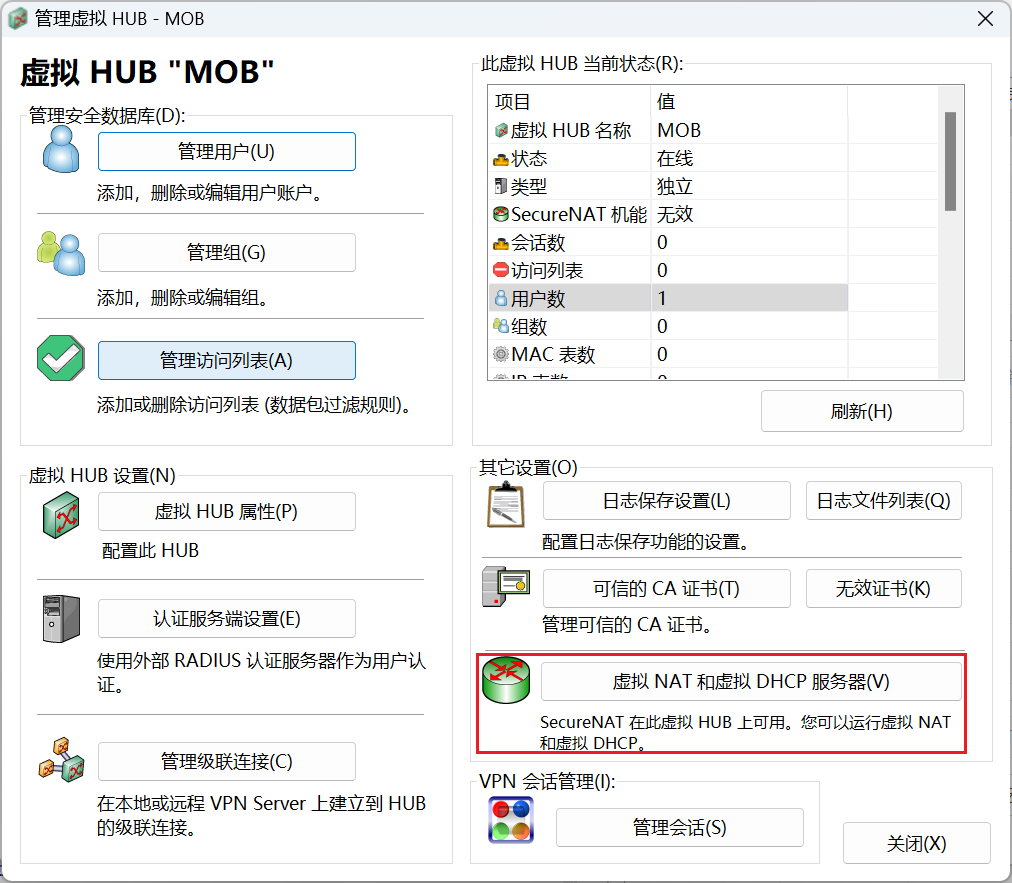
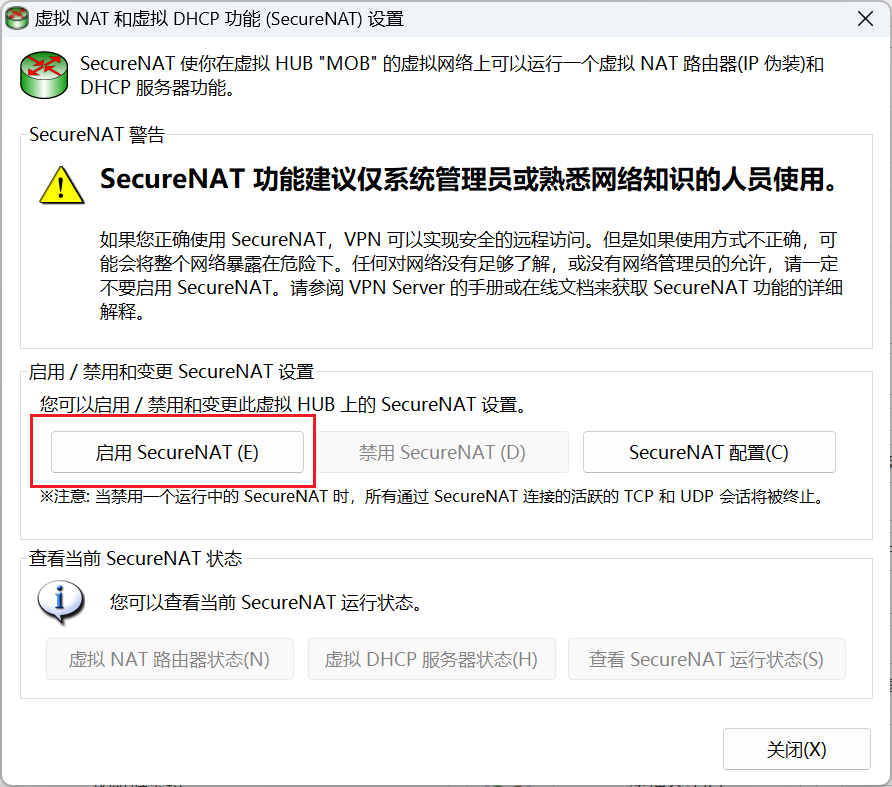
2.5 启动 SecyreNAT,开启 NAT 转换和 DHCP 服务
在使用客户端登录之前,还需要启劢 SecyreNAT 服务。
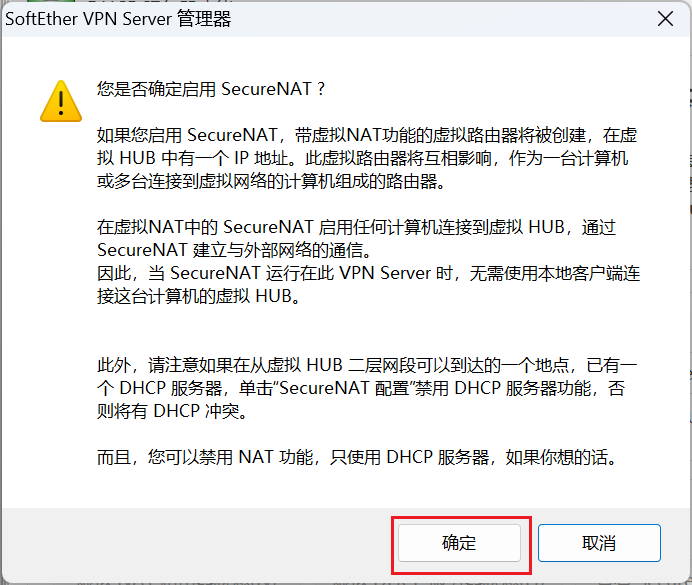
在管理虚拟 HUB-MOB 界面,点击【虚拟 NAT 和虚拟 DHCP 服务器】,在弹出的设置界面点击【启用 secyreNAT】即可。
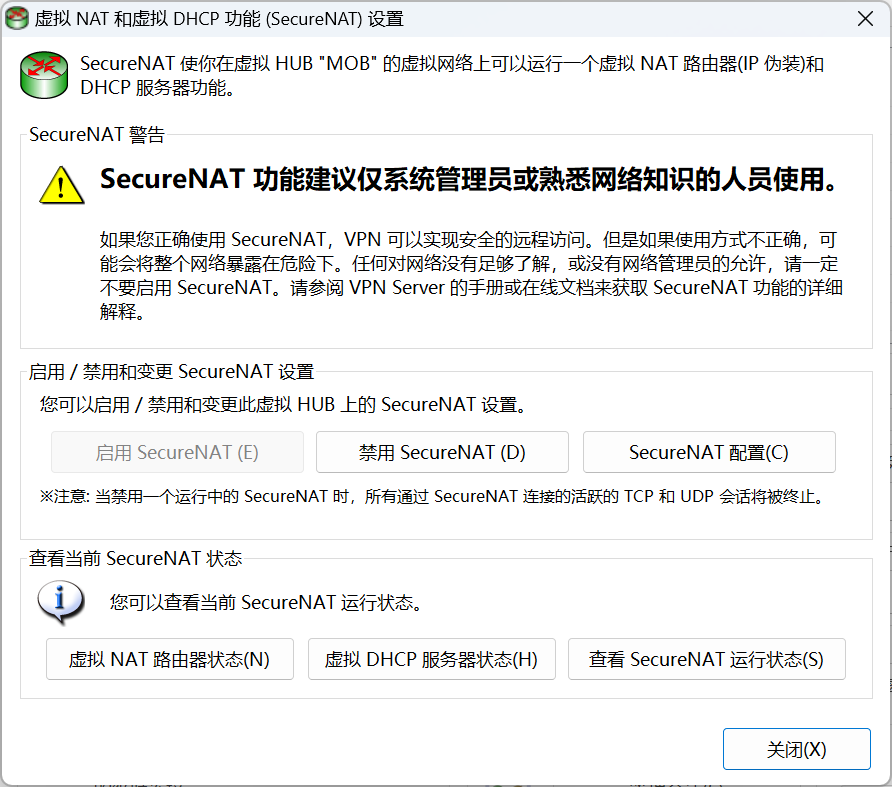
启用完成后界面如下
可以看到secureNAT的配置信息系如下
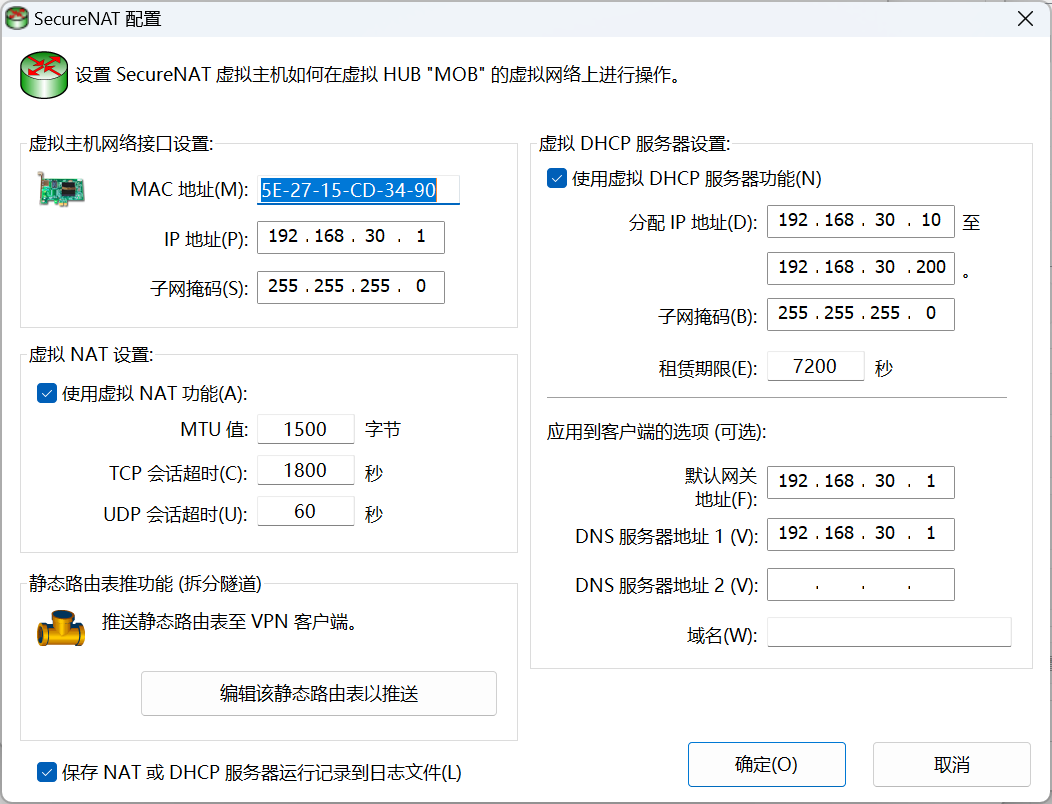
配置完成关闭配置页面
三、安装客户端并进行连接测试
3.1 下载安装客户端软件
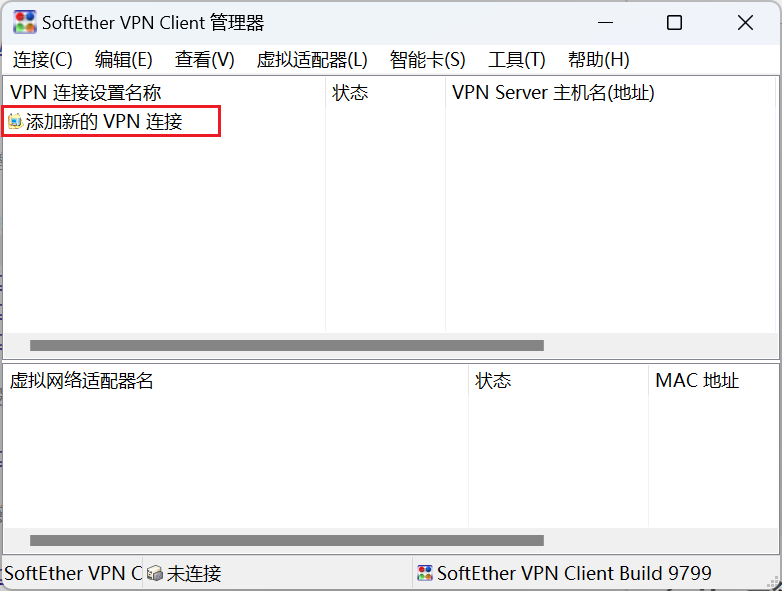
3.2 运行client管理工具
安装完成后,双击快捷方式便可运行客户端工具
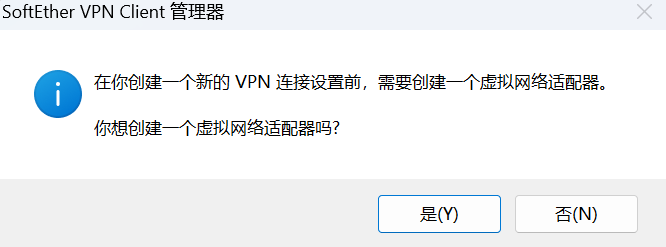
双击【添加新的VPN连接】 点击【确定】就会自动创建一个新的网卡适配器

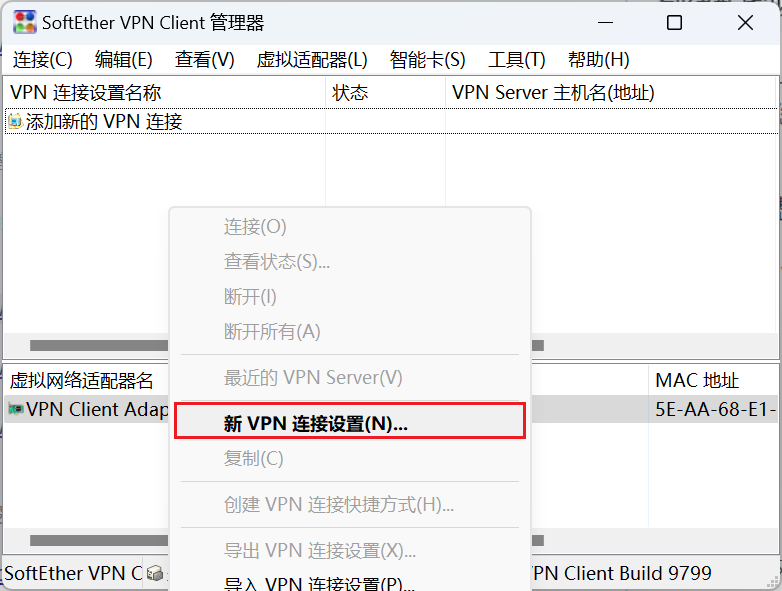
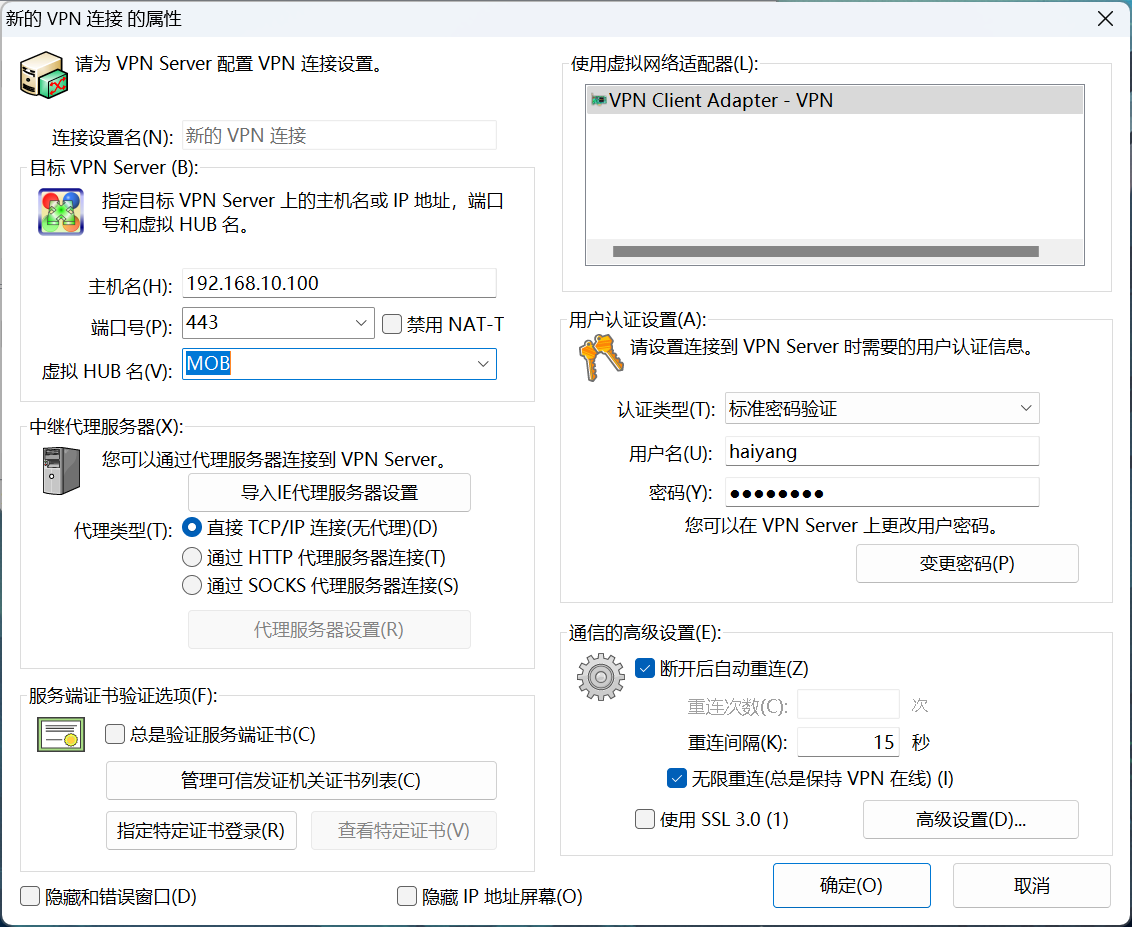
空白处右击,选择 【新 VPN 连接设置向导】进行如下配置,点击【确定】
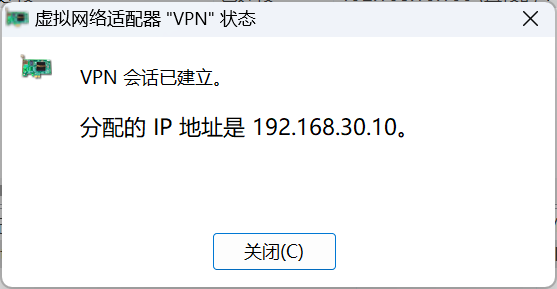
设置完成后 双击连接 便可 建立连接。同时提示分配的ip
如果win7 和softether server的时间不同步,那么就会出现连接失败。
只需要同步二者的时间即可,windows直接同步internet时间
centos执行如下命令
[root@localhost vpnserver]#  service ntpd stop
Redirecting to /bin/systemctl stop ntpd.service
You have new mail in /var/spool/mail/root
[root@localhost vpnserver]# ntpdate time.windows.com
21 Jul 00:13:20 ntpdate[2372]: step time server 52.231.114.183 offset 4447363.047880 sec
[root@localhost vpnserver]# date
Thu Jul 21 00:13:23 +08 2022